
English
Views: 0 Author: Site Editor Publish Time: 2026-09-08 Origin: Site


In a Man Overboard (MOB) emergency, survival hinges on deployment speed. Every second spent struggling with a jammed cabinet or running to a distant deck reduces the probability of a successful rescue. Marine environments rapidly degrade exposed lifesaving equipment through UV radiation, saltwater corrosion, and extreme weather. Enclosing lifebuoys in protective boxes introduces a new risk: delayed access and deployment friction if the installation location or mounting method is poorly planned. Balancing equipment longevity with instant accessibility requires a strategic approach. This guide breaks down regulatory compliance, zone-specific placement strategies, application scenarios, and technical mounting considerations for commercial vessels. We focus on practical execution, ensuring your safety gear remains protected yet instantly available when seconds count.
Compliance is Non-Negotiable: Placement must adhere strictly to SOLAS and IMO regulations, ensuring lifebuoys are rapidly accessible and never permanently secured or locked.
Zone-Specific Engineering: Bridge wings require specialized quick-release setups with heavier (4.0kg) lifebuoys, while main decks require high-visibility, unobstructed spacing.
Ergonomics and Deployment: Proper marine lifebuoy box installation must account for the user's physical stance, ensuring enough deck space to safely step on the inboard lifeline and execute an unobstructed throw.
Mounting Integrity: Installations must withstand constant vessel vibration, wind loads, and galvanic corrosion by utilizing marine-grade (316L) stainless steel hardware.
International maritime law strictly dictates how lifesaving appliances are distributed across a vessel. Proper shipboard lifebuoy placement is governed primarily by SOLAS Chapter III. The regulations mandate that lifebuoys must be distributed so they are readily available on both sides of the ship and as far forward and aft as practicable. The exact number depends on the vessel's length. For instance, cargo ships under 100 meters in length require a minimum of eight lifebuoys. Vessels between 100 and 150 meters require ten. Ships ranging from 150 to 200 meters need twelve, and any vessel exceeding 200 meters must carry at least fourteen. These are baseline minimums; operators often exceed these numbers to account for complex deck layouts or obstructed walkways.
The most critical operational mandate is that lifebuoys must be capable of being rapidly cast loose. Storage boxes must protect the equipment from environmental degradation without introducing physical barriers. This means no keys, no complex latching mechanisms, and no excessive force required to open the cabinet door. A crew member wearing heavy winter gloves must be able to open the enclosure and deploy the ring in under five seconds. Furthermore, storage locations must remain highly visible under all conditions, necessitating the use of IMO-compliant photoluminescent signage mounted directly above or on the cabinet exterior.
Not all lifebuoys are identical, and their placement depends heavily on their mass and attached accessories. Standard 2.5kg lifebuoys are distributed along the main decks and walkways for general use. These lighter units are designed to be thrown manually by a crew member over a reasonable distance to a person in the water. They must survive a drop test from the stowage position to the waterline in the lightest seagoing condition, or 30 meters, whichever is greater.
Conversely, 4.0kg lifebuoys are engineered for specific deployment mechanisms. These heavier variants are mandatory on bridge wings. The additional mass is required to overcome the friction of quick-release chutes and to pull the activation pins on attached self-activating smoke signals and self-igniting lights. Installing a 2.5kg lifebuoy in a bridge wing quick-release box is a severe compliance failure, as the lighter ring lacks the kinetic energy to deploy the marker buoy properly when released.
Bridge wings represent the primary vantage point for the officer on watch. When an MOB is called, the initial response almost always originates from this location. Storage boxes here are typically integrated with quick-release mechanisms. The officer pulls a single lever inside the wheelhouse or on the wing console, allowing the cabinet floor to drop or the housing to release the 4.0kg lifebuoy and its attached MOB marker simultaneously.
Clearance is the primary engineering constraint for bridge wing installations. The drop trajectory must be completely clear of lower decks, lifeboats, and structural protrusions. If the lifebuoy strikes a lower deck during a drop, the smoke signal may shatter, or the ring itself could be damaged before reaching the water.
Determining the optimal lifebuoy storage location on ship main decks requires calculating maximum travel distances. Crew members should never have to travel more than 30 meters to reach the nearest lifebuoy. On large commercial vessels, this requires an even distribution along the port and starboard guardrails or bulkheads. Cargo operations complicate this spacing. Placement must avoid areas prone to heavy machinery impact, such as crane swing paths or forklift transit routes. Cabinets should not be installed where temporary cargo containers might block access.
Deployment ergonomics also dictate placement. The installation location must provide adequate deck space for a crew member to establish a secure footing, step firmly on the inboard end of the buoyant line, and execute a clear, two-handed throw over the victim's head.
At muster stations, lifebuoys serve as secondary support during vessel abandonment. These high-traffic zones require lifebuoys equipped with buoyant lifelines measuring at least 30 meters or twice the height of the stowage position above the waterline, whichever is greater. Storage boxes in these areas must keep the lifelines completely dry. A waterlogged lifeline becomes heavy, prone to tangling, and significantly reduces the throwing distance.
The stern presents a high risk for MOB incidents, particularly during mooring operations. Crew members handle heavy hawsers under immense tension, creating dangerous snap-back zones. Lifebuoy cabinets must be positioned outside these snap-back zones to ensure they remain accessible even if a line parts. Additionally, aft placements must keep the storage box clear of fairleads, winches, and the direct path of mooring lines. The cabinet should be mounted on a solid bulkhead or heavy-duty stanchion that provides immediate over-side access for the aft mooring party without requiring them to cross active lines.
To ensure proper spacing and compliance across all zones, operators should follow a systematic site survey process:
Obtain the vessel's general arrangement plan and mark all mandatory bridge wing and muster station locations.
Measure 30-meter intervals along all exposed port and starboard walkways to identify baseline main deck positions.
Overlay cargo handling paths, crane swing radii, and mooring snap-back zones to eliminate hazardous mounting points.
Adjust the baseline positions forward or aft to align with solid bulkheads or reinforced guardrail stanchions.
Verify that each finalized location offers an unobstructed drop trajectory to the waterline.
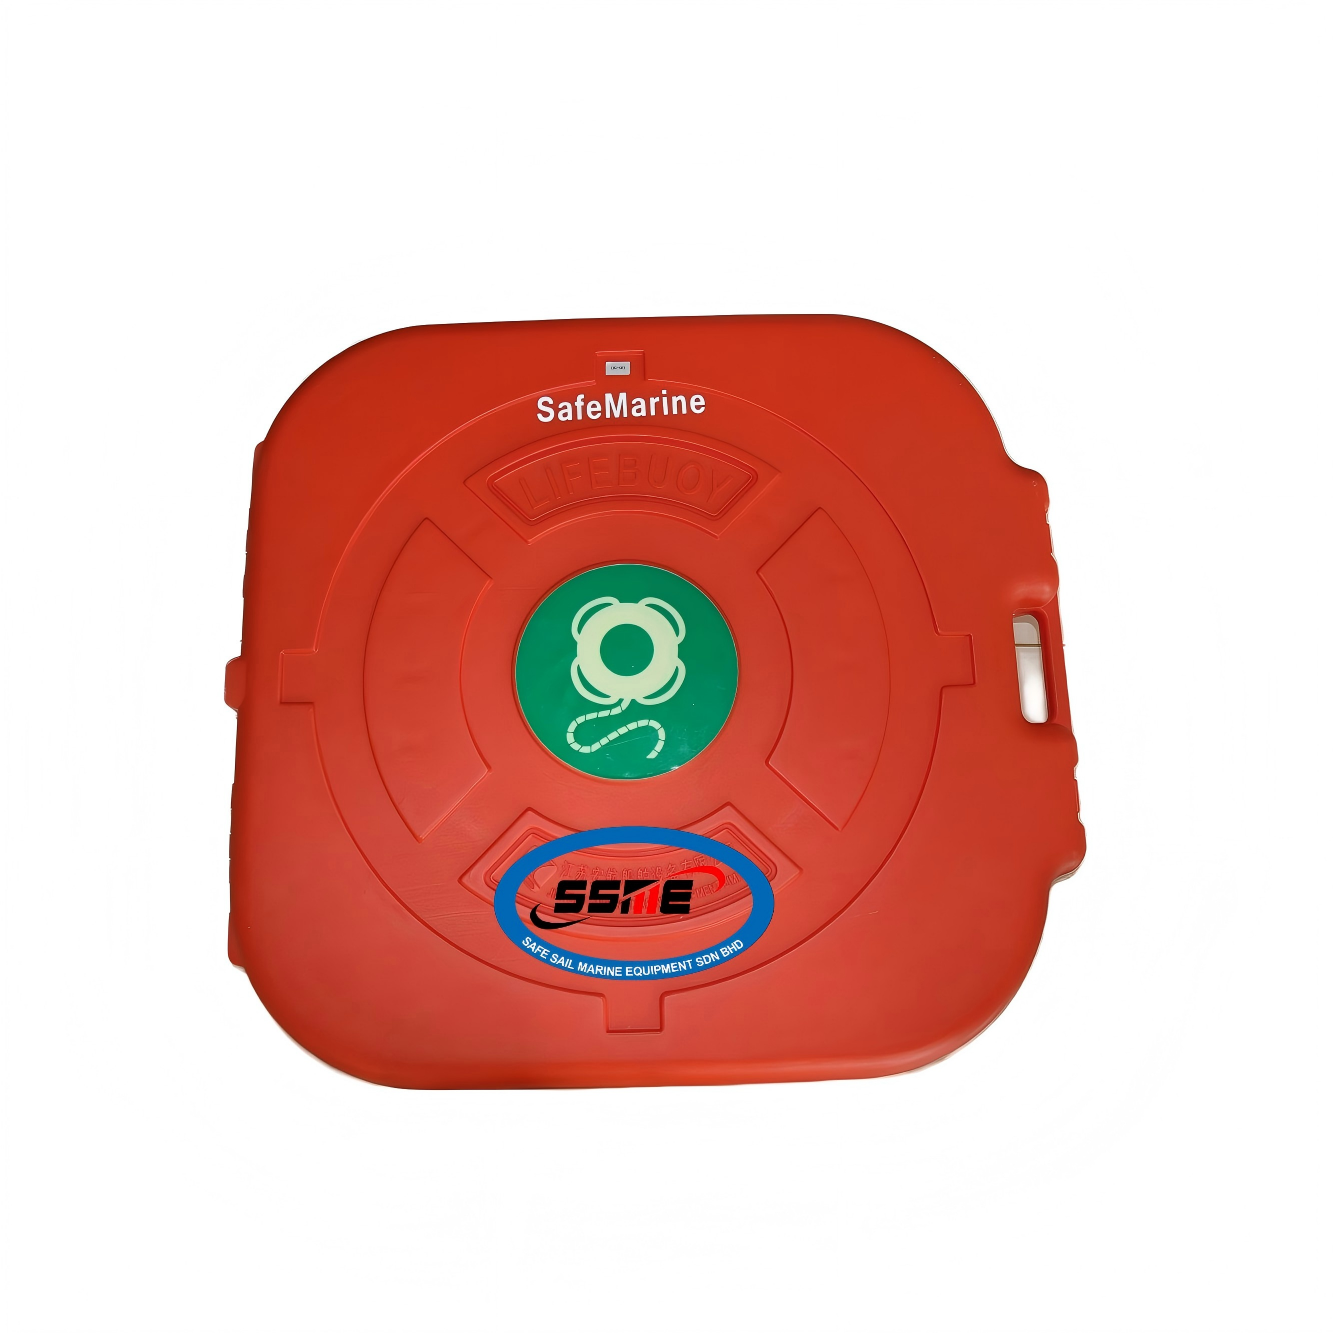
Mounting directly to a steel superstructure bulkhead provides the most rigid support for lifebuoy storage box installation. However, drilling and tapping into marine steel requires careful structural consideration. Installers must verify that the chosen bulkhead does not compromise watertight integrity or penetrate sensitive internal spaces like fuel tanks or electrical lockers. Installers must gather the correct materials before beginning the process. This includes a center punch, cobalt drill bits sized for the specific tap, a high-quality threading tap, 316L stainless steel bolts, Delrin isolation washers, and marine-grade polyurethane sealant.
The process begins by center-punching the hole locations to prevent the drill bit from wandering on the steel surface. After drilling pilot holes, the installer steps up to the final diameter before carefully tapping the threads. Cutting fluid must be used during tapping to prevent the tool from snapping inside the bulkhead.
Vibration is a constant force on commercial vessels. Direct bolting without isolation can cause the plastic or fiberglass cabinet to crack around the mounting holes due to structural fatigue. Backing plates should be used on the interior of the bulkhead to distribute the load, while heavy-duty rubber vibration-damping washers must be placed between the cabinet and the steel. Marine sealant must be applied to the bolt threads and under the washers to prevent water ingress. Optimal mounting height generally places the center of the lifebuoy between 1.2 and 1.5 meters above the deck, allowing crew members of varying statures to easily lift the unit out of the housing.
Guardrail mounting is common along exposed walkways where bulkheads are unavailable. This method utilizes specialized rail brackets and heavy-duty U-bolts. The primary advantage is immediate over-side access; the crew member simply opens the box and drops the ring directly into the water. The trade-off involves severe environmental exposure. Rail-mounted boxes face the brunt of wind loads and green water impact during heavy weather.
To prevent the cabinet from rotating on the tubular rail under these forces, installers must use anti-slip rubber gaskets inside the U-bolt brackets and torque the nuts to specific tolerances. Standard galvanized hardware will rust rapidly in this exposed position, leading to failure. Proper marine lifebuoy box installation on rails demands 316L stainless steel hardware exclusively.
In wide-open deck spaces or specific lazarette configurations where neither bulkheads nor rails are suitable, freestanding pedestals are required. This involves welding a steel or aluminum stanchion directly to the deck. Deck penetrations for pedestal mounting demand rigorous sealing. The welding process requires chipping away existing deck paint, performing the weld, conducting non-destructive testing (NDT) to ensure structural integrity, and applying a multi-part marine epoxy coating to prevent under-film corrosion. The pedestal itself must be robust enough to prevent the cabinet from swaying heavily during vessel roll.
Comparison of Lifebuoy Box Mounting Methods | |||
Mounting Method | Primary Advantage | Key Structural Requirement | Ideal Location |
|---|---|---|---|
Bulkhead Mount | Maximum rigidity and protection | Vibration-damping washers, backing plates | Superstructure walls, muster stations |
Rail Mount | Immediate over-side deployment | Anti-slip gaskets, heavy-duty U-bolts | Main deck walkways, exposed edges |
Pedestal Mount | Placement flexibility in open areas | Deck welding, epoxy corrosion sealing | Aft decks, open cargo areas |
The primary purpose of lifebuoy protection box mounting is to shield the lifesaving equipment from the harsh marine environment. Ultraviolet radiation causes the polyethylene shell of the lifebuoy to become brittle and degrades the adhesive on retro-reflective tape. Storage boxes are typically manufactured from either Fiberglass Reinforced Plastic (FRP) or High-Density Polyethylene (HDPE).
HDPE offers superior impact resistance and will not splinter if struck by cargo gear, provided it is treated with high-grade UV inhibitors during manufacturing. FRP provides excellent rigidity and weatherproofing but can crack under blunt force. Regardless of the material, the cabinet door must feature a robust overlapping lip or a rubber weather seal to prevent wind-driven saltwater from flooding the interior.
No marine enclosure is entirely waterproof under extreme conditions. Therefore, drainage engineering is critical. Storage boxes must feature weep holes at their lowest point, typically 10mm in diameter. Without drainage, condensation and minor leaks accumulate, submerging the lower section of the lifebuoy. Trapped moisture creates a micro-environment that promotes mold, rot, and the rapid degradation of the buoyant lifeline and the lifebuoy's perimeter grablines. Passive ventilation louvers, shielded from direct spray, allow air circulation to keep the interior dry and maintain the structural integrity of the ropes.
Mounting plastic or FRP boxes to steel ships requires metal fasteners, introducing the risk of dissimilar metal corrosion. When stainless steel bolts are threaded directly into carbon steel bulkheads in a saltwater environment, galvanic corrosion accelerates, rapidly eating away the weaker metal. Installers must mandate the use of isolation washers, such as nylon or Delrin, to separate the fastener heads from the cabinet material, and apply anti-seize compounds to the bolt threads. All mounting hardware, including hinges, latches, and bolts, must be constructed from 316L marine-grade stainless steel. Lower grades, such as 304, will exhibit tea-staining and eventually seize.
One of the most dangerous practices observed during marine lifesaving equipment service audits is the locked box fallacy. To prevent theft while in port, crew members sometimes secure lifebuoy cabinets with heavy-duty zip-ties or brass padlocks. When the vessel puts to sea, these restraints are often forgotten. In an MOB situation, a locked cabinet causes fatal delays. A crew member without a knife cannot break a heavy zip-tie, rendering the lifebuoy useless. The compliant alternative is to use easily breakable, tamper-evident inspection seals. These thin plastic tags deter casual tampering in port but snap instantly when the cabinet door is pulled open with force.
A lifebuoy is only effective if it can reach the victim. Cabinets that house lifebuoys with 30-meter buoyant lines often suffer from improper line stowage. If the rope is haphazardly stuffed into the box, it will bird-nest and snag during deployment, causing the lifebuoy to jerk to a halt mid-air. Best practices dictate flaking the line in a figure-eight pattern or using a dedicated spooling bracket inside the cabinet. The inboard end of the line must be left protruding or secured in a highly visible clip just inside the door. This ensures the deploying crew member can immediately grasp it or step on it before throwing the ring.
Storage boxes fail at their moving parts. Seized hinges and brittle plastic latches are common reasons for deployment failure. Salt accumulation crystallizes inside hinge barrels, locking them solid. If a crew member pulls on a seized door, the plastic handle may snap off entirely. Routine maintenance schedules must include washing hinges with fresh water and applying marine-grade lithium grease or dry Teflon lubricant. Latches should be inspected monthly for UV embrittlement and replaced immediately if hairline cracks appear.
Operators should enforce a strict maintenance checklist for all deck enclosures:
Monthly Visual Inspection: Check the exterior of the cabinet for UV degradation, cracking, or impact damage from cargo operations.
Hardware Lubrication: Apply dry Teflon lubricant to all 316L stainless steel hinges and latches to prevent saltwater crystallization.
Seal Verification: Ensure the rubber weather seal around the door perimeter remains supple and free of dry rot.
Lifeline Check: Remove the buoyant lifeline entirely, inspect for chafe or mold, and re-flake it in a figure-eight pattern.
Drainage Clearance: Manually clear the bottom weep holes of any accumulated salt, dirt, or debris to guarantee proper water egress.
Procuring lifesaving equipment is a highly regulated process. A reputable lifebuoy storage box supplier must provide hardware that aligns with international standards, such as the Marine Equipment Directive (MED) / Wheelmark in Europe, or USCG approval in the United States. Vessel operators should request comprehensive material data sheets before procurement. These documents verify the cabinet's UV resistance ratings, structural load capacities, and the specific grade of stainless steel used for the hardware. Installing uncertified, commercial-grade plastic boxes leads to rapid failure and detentions during Port State Control (PSC) inspections.
For operators managing multiple vessels, standardizing the storage box footprint across the fleet offers significant operational advantages. Sourcing from a supplier capable of outfitting an entire fleet ensures that mounting brackets, replacement latches, and hinges are uniform. Standardization drastically simplifies maintenance routines and spare parts procurement. It also enhances crew training; a sailor transferring from one vessel to another will instinctively know how to open the cabinet and deploy the lifebuoy without hesitation, saving critical seconds during an emergency.
Audit all current deck placements to verify the 30-meter maximum travel distance rule is met across all exposed walkways.
Replace any padlocks or heavy-duty zip ties on storage cabinets with compliant, breakable tamper-evident seals.
Inspect and lubricate all cabinet hinges and latches with marine-grade lithium grease to prevent saltwater seizure.
Verify that all bridge wing quick-release mechanisms operate smoothly under the specific weight of a 4.0kg lifebuoy.
Restow all buoyant lifelines using a figure-eight flaking method to guarantee snag-free deployment during an emergency.
A: The optimal mounting height places the center of the lifebuoy between 1.2 and 1.5 meters above the deck. This ergonomic positioning ensures that crew members of varying statures can quickly unlatch the door and lift the lifebuoy out without excessive bending or straining.
A: Cargo ships require lifebuoys spaced evenly along exposed decks, avoiding crane paths and container storage zones. Passenger vessels require higher densities of lifebuoys, particularly near muster stations, embarkation decks, and public promenade areas, to account for the higher number of untrained personnel onboard.
A: No. Lifebuoys must be capable of being rapidly cast loose at all times. Using padlocks or heavy zip-ties violates SOLAS regulations and creates fatal delays. To deter theft in port, vessels should use thin, tamper-evident inspection seals that break instantly when the door is pulled.
A: Standard 2.5kg lifebuoys are placed along main decks and walkways for manual throwing. Heavier 4.0kg lifebuoys are strictly required on bridge wings. The extra mass is necessary to operate quick-release chutes and pull the activation pins on attached self-activating smoke and light signals.
A: The buoyant line must be flaked in a figure-eight pattern or loosely coiled on a dedicated bracket to prevent bird-nesting. The inboard end must be highly visible and easily accessible so the user can firmly grasp it or step on it before throwing the lifebuoy.
A: Yes. Weep holes at the lowest point of the cabinet are essential. They allow condensation and minor saltwater ingress to drain, preventing the buoyant lifeline and grablines from rotting or becoming waterlogged, which would negatively alter the throwing dynamics.


